This tutorial was written on Windows 10 using WSL with an O3DE version that
was built from source, on commit e2c4c0e5e3
In the previous article we created assets to populate our level.
In this article we are going to be writing the scripts that control our paddles.
Setting up Input
Much like we did in Part 3 of this series where we captured input to dimiss the start menu. The first step, as before, is to create an input bindings file to capture the keyboard events we are interested in.
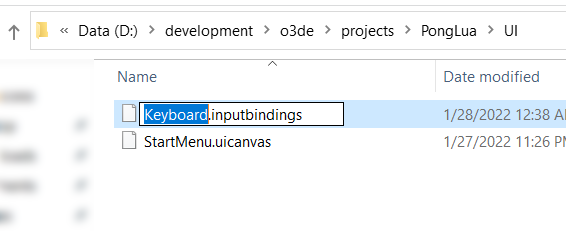
Since we will be adding new input bindings to the StartMenu.inputbindings file,
we should rename it to be more accurate. Let's call it Keyboard.inputbindings
We can't rename it in the Editor so we will have to do it in Explorer.
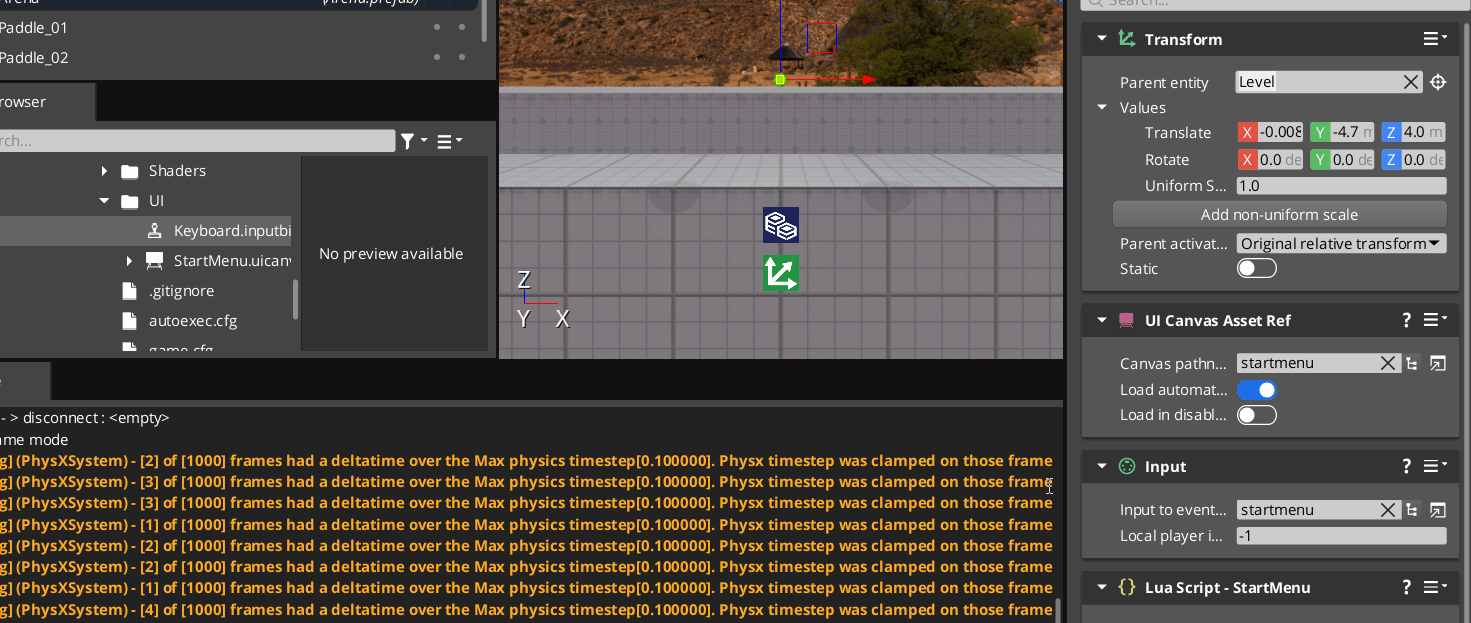
The editor will automatically pick up the change, however, the Input component
on the Start Menu entity did not recognize the change! We are going to have to
take our newly renamed Keyboard.inputbindings and drag them back onto our
Input component.
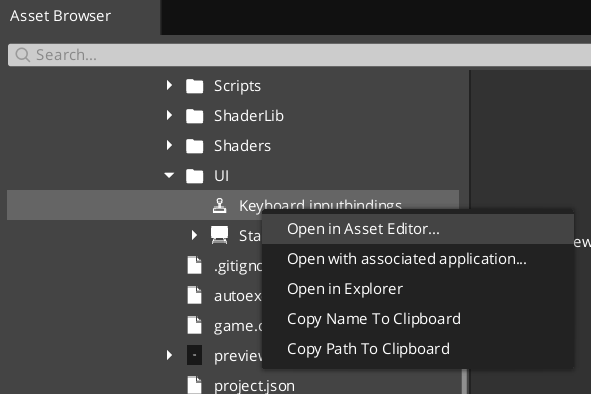
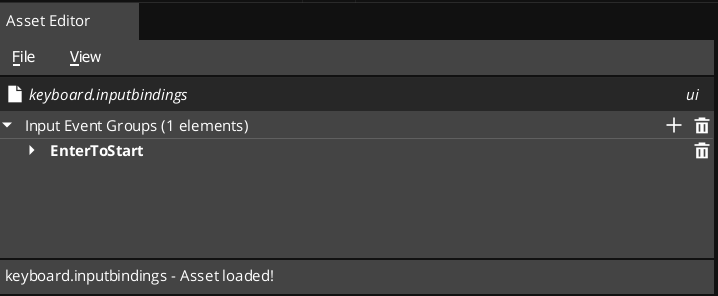
Next let's add our new bindings. Right click the Keyboard.inputbindings asset
in the Asset Browser and select Open in Asset Editor...
 |
 |
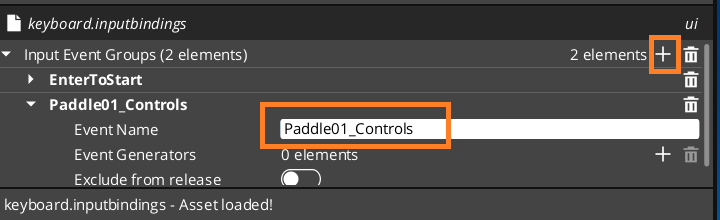
In the Asset Browser lets add a new Input Event Group and call it Paddle01_Controls.
These will be the keys we use to control Paddle01.
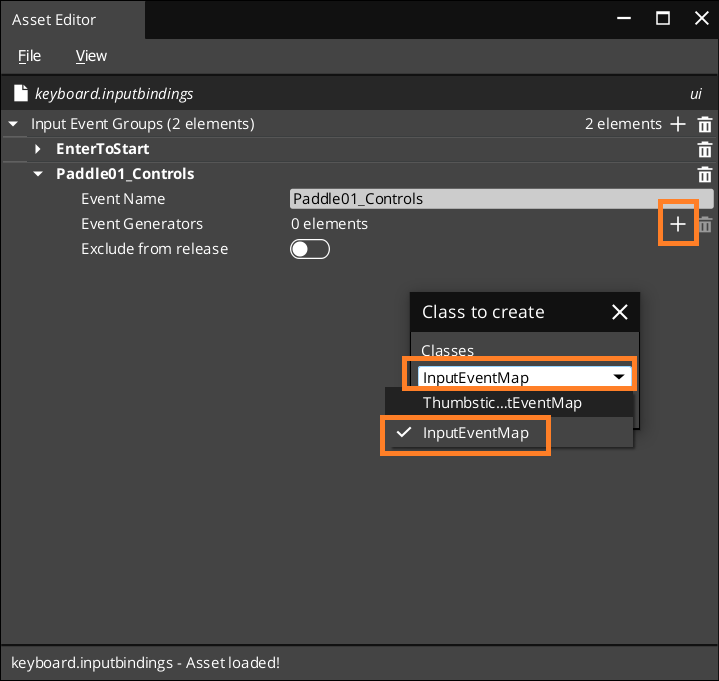
We are going to add two Event Generators one for the key that moves the paddle
up, and one that moves the paddle down.
Press the + button to add the first Event Generator to bring up the Class to create
popup. From the dropdown list select InputEventMap. Do it again so you have 2
Event Generators for Paddle01_Controls
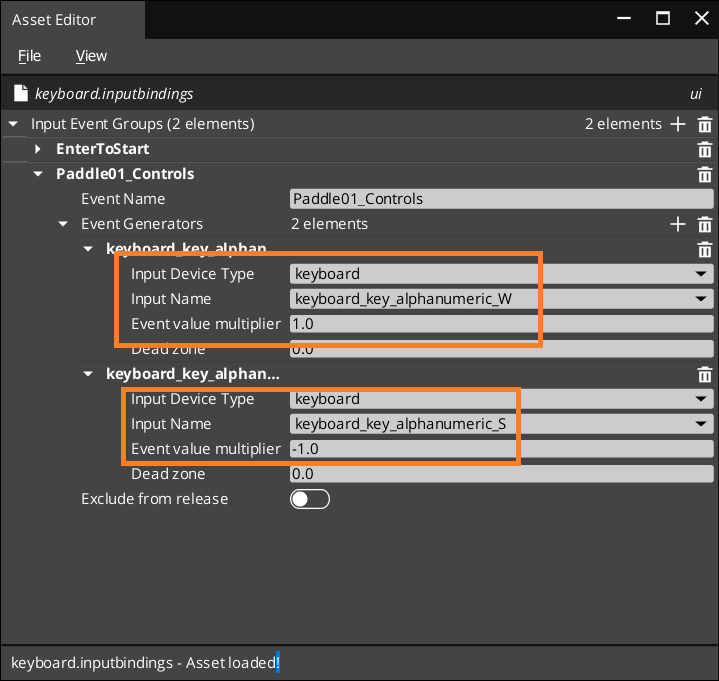
Set both Event Generators to use keyboard as their Input Device Type.
We want one to capture key presses for the W key, which will move our paddle
upwards. The other will capture key presses for the S key, which will move our
paddle downwards. We will be using the event value multiplier to modify the
value variable that is sent to the event handler to know which key was pressed.
Set the W key to have a 1.0 modifier, and the S key to have a -1.0 modifier.
Make sure we save afterwards!
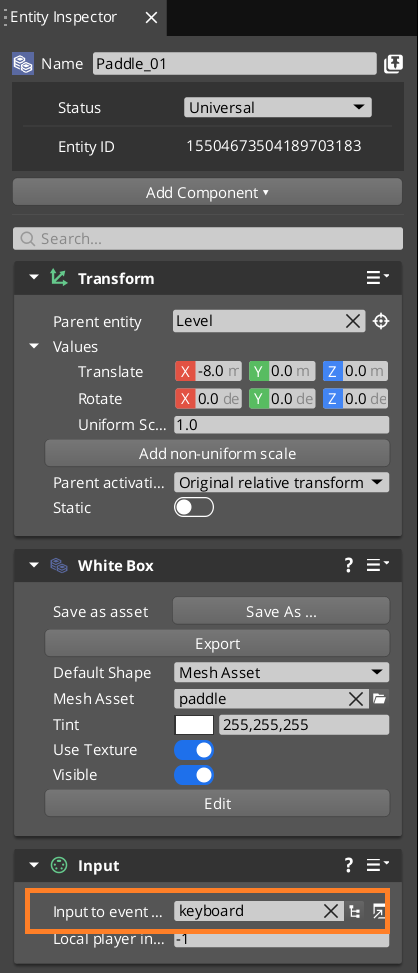
Find our Paddle_01 entity and select it in the Entity Outliner. Use the
Add Component button to add an Input component to this entity. Just like
before we can drag our Keyboard.inputbindings into the appropriate property
on the Input component.
We can take advantage of copying and pasting components to add the same input
component onto Paddle_02. Use the right-click popup menu on the Input component
to select Copy Component. Then right click anywhere on the Paddle_02 Entity Inspector
and select Paste Component.
Receiving Key Events For Paddle Movement
Select the Paddle_01 entity and add a Lua Script component. Then open the
Lua Editor either from the component, or through the Tools | Lua Editor menu.
Create a new Lua Script from File | New in the Lua Editor. Save it in your Scripts
directory and name it PaddleMovement.lua
Just like the previous StartMenu.lua script, we can create the basic skeleton
needed for O3DE lua scripts.
 1
 2 --
 3 -- Properties #################################################################
 4 --
 5 PaddleMovement = {
 6     Properties = {
 7     }
 8 }
 9
10 --
11 -- Lifecycle ##################################################################
12 --
13
14 function PaddleMovement:OnActivate()
15
16 end
17
18 --
19 -- ----------------------------------------------------------------------------
20 --
21
22 function PaddleMovement:OnDeactivate()
15
24 end
25
26 --
27 -- ############################################################################
28 --
29
30 return PaddleMovement;
Similar to how we configured StartMenu.lua we want to subscribe to the InputEventNotificationBus
to be notified whenever the keys we are interested are pressed. One small change, however, is that
since want to share this script with both paddles, we should expose the Input Event Group name
to the component so we can change exactly which keyset we are subscribing to.
We also want to subscribe not just to the key press event, but while the key is held down as well.
 1
 2 --
 3 -- Properties #################################################################
 4 --
 5 local PaddleMovement = {
 6     Properties = {
 7         InputEventName = "Paddle01_Controls",
 8     }
 9 }
10
11 --
12 -- Input Handler ##############################################################
13 --
14
15 -- there are 3 handlers we can receive for each input: OnPressed, OnHeld, and OnReleased
16 -- they each come with a value that may represent the state of the input (for example
17 -- the tilt of a thumbstick).  This is configured in the input binding.
18 function PaddleMovement:OnPressed (value)
19     Debug.Log(tostring(value))
20 end
21
22 --
23 -- ----------------------------------------------------------------------------
24 --
25
26 function PaddleMovement:OnHeld (value)
27     Debug.Log(tostring(value))
28 end
29
30
31 --
32 -- Lifecycle ##################################################################
33 --
34
35 function PaddleMovement:OnActivate()
36     -- connect to InputEventNotificationBus and set ourselves as the handler
37     self.InputNotificationBus = InputEventNotificationBus.Connect(
38         self, InputEventNotificationId(self.Properties.InputEventName)
39     );
40
41 end
42
43 --
44 -- ----------------------------------------------------------------------------
45 --
46
47 function PaddleMovement:OnDeactivate()
48     self.InputNotificationBus:Disconnect();
49 end
50
51 --
52 -- ############################################################################
53 --
54
55 return PaddleMovement;
We print out the value that is being sent with us and with this script when
you run the game, you should get 1.0 printing when you press W and -1.0
printing when you press S. Now all we need to do is use these values to
translate our paddle.
Moving our Paddle
We can do this by sending an event on the TransformBus with our entityId
(so we communicate with our own Transform component). The event we want to send
is called MoveEntity. We could just pass it the value we received from the
input system, but we could also add a Property called PaddleSpeed and use
that as a multiplier so we have some control over how fast it moves. Putting
all that together we get a script that looks like this:
 1
 2 --
 3 -- Properties #################################################################
 4 --
 5 local PaddleMovement = {
 6     Properties = {
 7         InputEventName = "Paddle01_Controls",
 8         PaddleSpeed = 1.0,
 9     }
10 }
11
12 --
13 -- Input Handler ##############################################################
14 --
15
16 -- there are 3 handlers we can receive for each input: OnPressed, OnHeld, and OnReleased
17 -- they each come with a value that may represent the state of the input (for example
18 -- the tilt of a thumbstick).  This is configured in the input binding.
19 function PaddleMovement:OnPressed (value)
20     self:_Move(value);
21 end
22
23 --
24 -- ----------------------------------------------------------------------------
25 --
26
27 function PaddleMovement:OnHeld (value)
28     self:_Move(value);
29 end
30
31
32 --
33 -- Lifecycle ##################################################################
34 --
35
36 function PaddleMovement:OnActivate()
37     -- connect to InputEventNotificationBus and set ourselves as the handler
38     self.InputNotificationBus = InputEventNotificationBus.Connect(
39         self, InputEventNotificationId(self.Properties.InputEventName)
40     );
41
42 end
43
44 --
45 -- ----------------------------------------------------------------------------
46 --
47
48 function PaddleMovement:OnDeactivate()
49     self.InputNotificationBus:Disconnect();
50 end
51
52 --
53 -- internal methods ###########################################################
54 --
55
56 function PaddleMovement:_Move(deltaMove)
57     TransformBus.Event.MoveEntity(self.entityId, Vector3(0, deltaMove * self.Properties.PaddleSpeed, 0));
58 end
59
60 --
61 -- ############################################################################
62 --
63
64 return PaddleMovement;
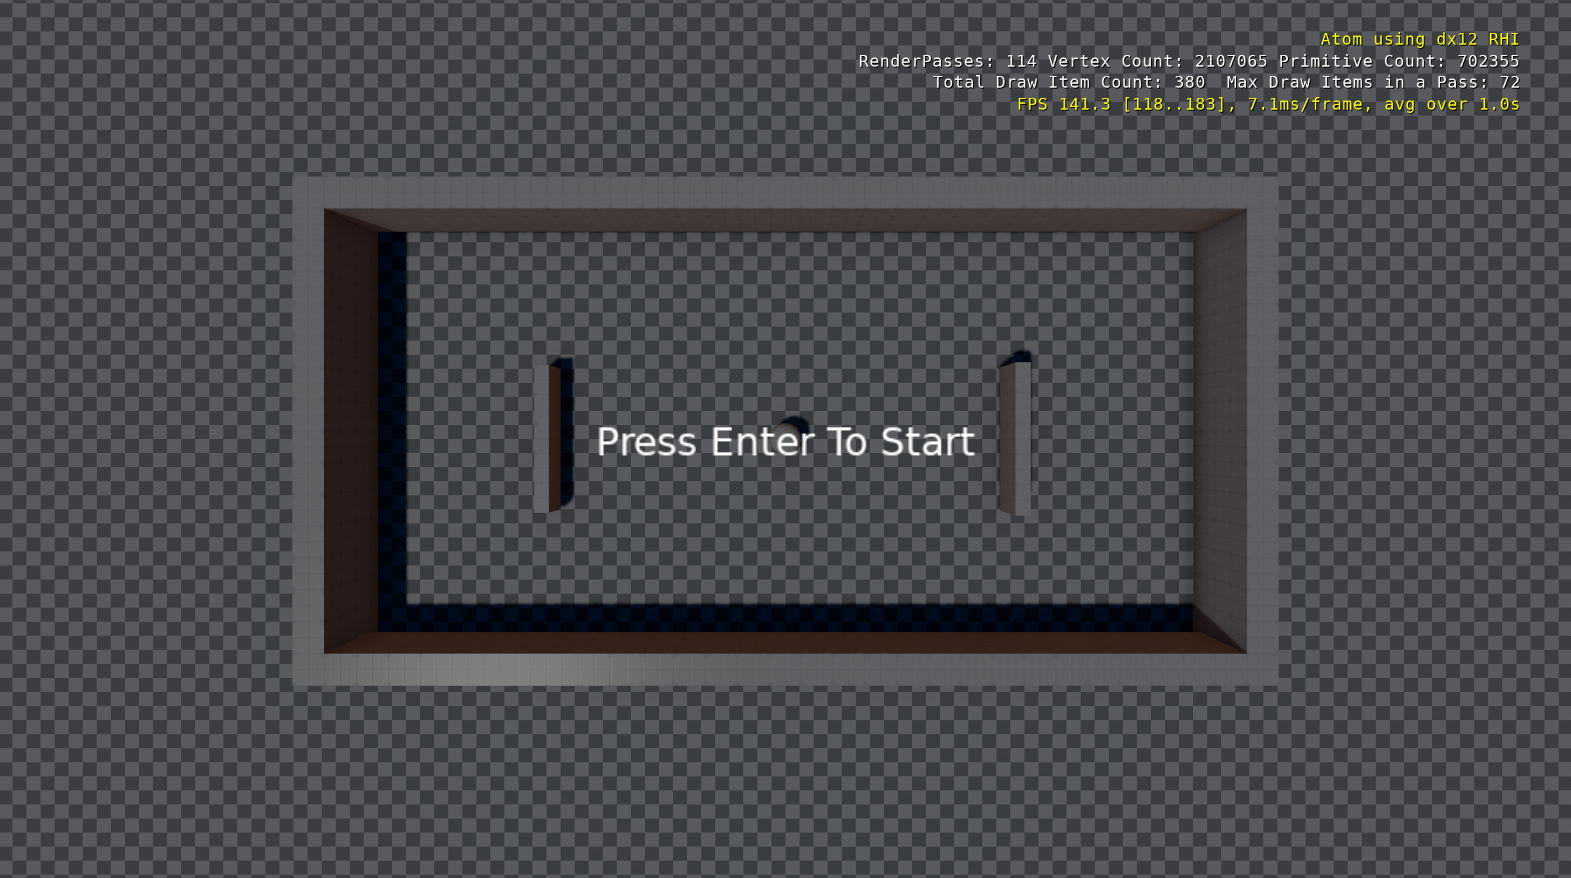
When we run this, we see this is better but there are three problems.
Problem 1: Our start menu continues to close when we press
Enterbut we no longer are blocking input until it is dismissed, so the paddles can move before we dismiss theStart Menu.Problem 2: Or paddles can travel outside of the arena!
Problem 3: This is harder to see right now, but it's the fact that we are moving our paddles based on the speed at which we are receiving inputs from the
InputNotificationBus. The problem with this is that the speed of our paddles is now tied to how often we receive notifications. If the framerate is running quickly, and the bus is sending us a notification every frame, then the paddles will move quicker. If the framerate is slow, and the bus is sending us notifications slowly, our paddles will slow down.
Traditionally we would solve Problem 3 by updating the paddle motion once per frame and scale it based on the amount of time that has passed since the last update (deltaTime). This way rather than tying the speed of the paddles to the rate at which we receive input events, we would instead scale their movement based on how much time has elapsed. This way we will always get consistent speeds regardless of framerate hitches or spikes.
To do this, we need to get a reliable update message from the engine, as well as
information about how much time has elapsed since the last update so we can scale
our motion. In O3DE we do this by subscribing to the TickBus.
However, since we also need to solve Problem 2 (colliding with the walls) and in the near future we need to collide with the ball, we will instead be transitioning to a movement system that leverages the PhysX physics system. By moving to PhysX we automatically get the benefits of scaling our motion based on frame time (since the physics simulation will be taking over our motion controls)
As an exercise for the curious I've posted the code sample for solving
Problem 3 using the TickBus as an appendix at the end of this article. I did
this effort just for you, and not at all because I did it before realizing I
would have to remove all that code once I switched over to using PhysX. Honest.
Fixing Problem 1 - Paddles Moving during Start Menu
Here the solution is solved in two steps. First, we need to create and send an event that notifies all entities that the game has started (triggered by the player pressing the enter key). Second, we want to prevent the paddles from moving until we receive this message.
This mechanism is also future proof, since when we start adding additonal paddle and ball movement, we can leverage the same system.
To do this, we are going to use the GameplayNotificationBus, a general purpose
bus designed to carry these kinds of messages.
Why not Script Events? The documentation seems to recommend them
over GameplayNotificationBus. The answer is that there is no
useful documentation for how to get it to work.
Creating the Script Event Asset
using the Asset Editor does make the event show up in Script Canvas
and is usable there, but there is no corresponding global bus that is connectable
in Lua. The only examples available are really really sketchy
The example basically creates a local script event and subscribes to it in a single
file, but it doesn't show how Script Event Assets are made globally
accessible in lua (or how to fetch them).
I tried looking through the code, and through other lua scripts, and read through every file in the Script Events
gem and I could not find a helpful API. I even tried mimicing the sketchy script
and instead of relying on the asset, and tried creating a Script Event in code,
but the example seems to imply that after calling Register on the
definition the variable becomes available globally, but this was not the case for me.
The GameplayNotificationBus is super easy to work with. You can send 3
different kinds of notifications:
OnEventBeginOnEventUpdatingOnEventEnd
When you send an event, you need to build a unique GameplayNotificationId that
identifies exactly which gameplay notification you are sending. For example,
lets say we wanted to send an event called MyEventName and along with it send
a string, and we want anybody to be able to subscribe to it.
1 local eventId = GameplayNotificationId(EntityId(), "MyEventName", typeid(string));
2 GameplayNotificationBus.Event.OnEventBegin(eventId, "Data Sent With Message")
3
Similarly to connect to this event would look like this:
1 local eventId = GameplayNotificationId(EntityId(), "MyEventName", typeid(string));
2 GameplayNotificationBus.Connect(self, eventId);
3
4 -- not real syntax but you get the idea
5 function self:OnEventBegin(data)
6     -- if we received the previous event, this would print "Data Sent With Message"
7     Debug.Log(data);
8 end
This is pretty easy, the problem is that there's a lot of hardcoded magic values
make it work. To solve this, we put all of this functionality into a single Lua
file. Inside your Scripts directory, create a file called GameStateEvents.lua
Inside, populate it with this:
 1
 2 --
 3 -- Game Start Event ===========================================================
 4 --
 5
 6 local GAME_START_EVENT_NAME="GameStartEvent";
 7
 8 local GameStartEvent = {
 9     Name = GAME_START_EVENT_NAME,
10     NotificationId = GameplayNotificationId(EntityId(),GAME_START_EVENT_NAME, typeid(string)),
11 };
12
13 --
14 -- ----------------------------------------------------------------------------
15 --
16
17 function GameStartEvent.Broadcast()
18     GameplayNotificationBus.Event.OnEventBegin(GameStartEvent.NotificationId, GameStartEvent.Name);
19 end
20
21 --
22 -- ----------------------------------------------------------------------------
23 --
24
25 function GameStartEvent.Connect(handler)
26     return GameplayNotificationBus.Connect(handler, GameStartEvent.NotificationId);
27 end
28
29 --
30 -- ============================================================================
31 --
32
33 return  {
34     GameStart = GameStartEvent,
35 };
36
Broadcasting
Now lets broadcast the message. Simply require the new lua file in StartMenu.lua
GameStateEvents = require('scripts.gamestateevents');
Then when we have the StartMenu:OnPressed event, we need to broadcast the event:
GameStateEvents.GameStart.Broadcast();
This works... sort of. The problem is it may trigger multiple times, if the player hits the enter key repeatedly, or multiple OnPressed events are generated. So we should probably also write a small guard that only sends the event if we haven't sent it yet. (The game should only start once). If we did need to reset the game, we will need to remember to reset this flag as well.
 1
 2 --
 3 -- Properties #################################################################
 4 --
 5 StartMenu = {
 6     Properties = {
 7     }
 8 }
 9
10 GameStateEvents = require('scripts.gamestateevents');
11
12 --
13 -- Input Handler ##############################################################
14 --
15
16 -- there are 3 handlers we can receive for each input: OnPressed, OnHeld, and OnReleased
17 -- they each come with a value that may represent the state of the input (for example
18 -- the tilt of a thumbstick).  This is configured in the input binding.
19 function StartMenu:OnPressed (value)
20
21     if not self._gameStarted then
22         -- get the canvas id from the UI Canvas Ref component on our entity
23         local canvasId = UiCanvasRefBus.Event.GetCanvas(self.entityId);
24
25         -- send a message to the Ui Canvas with the id we got from the Ui Canvas ref
26         -- and tell it to disable itself
27         UiCanvasBus.Event.SetEnabled(canvasId, false);
28
29         -- tell everyone the game has started
31         GameStateEvents.GameStart.Broadcast();
32
33         -- dont send repeats
34         self._gameStarted = true;
35     end
36 end
37
38 --
39 -- Lifecycle ##################################################################
40 --
41
42 function StartMenu:OnActivate()
43
44     -- a flag to ensure we dont send multiple notifications
45     self._gameStarted = false;
46
47     -- connect to InputEventNotificationBus and set ourselves as the handler
48     self.InputNotificationBus = InputEventNotificationBus.Connect(
49         self, InputEventNotificationId("EnterToStart")
50     );
51 end
52
53 --
54 -- ----------------------------------------------------------------------------
55 --
56
57 function StartMenu:OnDeactivate()
58     self.InputNotificationBus:Disconnect();
59 end
60
61 --
62 -- ############################################################################
63 --
64
65 return StartMenu;
Connecting
Connecting will seem mostly familiar. We will again need to import GameStateEvents.lua
and make sure we Connect to it using the GameStateEvents.GameStart.Connect function.
By convention, we are sending the name of the event as the payload. So on in our handler
function PaddleMovement:OnEventBegin we take a parameter e which will be GameStateEvents.GameStart.Name
If we receive a GameStartEvent with that as the payload, we know we are starting!
We will also need a flag to track whether or not we received the message, and we should not allow the paddle to move until we do.
Lastly, don't forget to disconnect during OnDeactivate.
 1
 2 --
 3 -- Properties #################################################################
 4 --
 5 local PaddleMovement = {
 6     Properties = {
 7         InputEventName = "Paddle01_Controls",
 8         PaddleSpeed = 1.0,
 9     }
10 }
11
12 GameStateEvents = require('scripts.gamestateevents');
13
14 --
15 -- Input Handler ##############################################################
16 --
17
18 -- there are 3 handlers we can receive for each input: OnPressed, OnHeld, and OnReleased
19 -- they each come with a value that may represent the state of the input (for example
20 -- the tilt of a thumbstick).  This is configured in the input binding.
21 function PaddleMovement:OnPressed(value)
22     self:_Move(value);
23 end
24
25 --
26 -- ----------------------------------------------------------------------------
27 --
28
29 function PaddleMovement:OnHeld(value)
30     self:_Move(value);
31 end
32
33 --
34 -- Internal Methods ###########################################################
35 --
36
37 function PaddleMovement:_Move(moveDir)
38     if self._gameStarted then
39         -- scale the current moveDir by both the paddle speed and the frame delta time
40         local deltaMove = Vector3(0, moveDir, 0) * self.Properties.PaddleSpeed;
41         TransformBus.Event.MoveEntity(self.entityId, deltaMove);
42     end
43 end
44
45 --
46 -- Lifecycle ##################################################################
47 --
48
49 function PaddleMovement:OnActivate()
50
51     self._moveDir = 0;
52     self._gameStarted = false;
53
54     -- connect to InputEventNotificationBus and set ourselves as the handler
55     self.InputNotificationBus = InputEventNotificationBus.Connect(
56         self, InputEventNotificationId(self.Properties.InputEventName)
57     );
58
59     -- connect to the script event `GameStateEvents` to receive the game start event
60     self.GameplayNotificationBus = GameStateEvents.GameStart.Connect(self);
61
62 end
63
64 --
65 -- ----------------------------------------------------------------------------
66 --
67
68 function PaddleMovement:OnEventBegin(e)
69     if e == GameStateEvents.GameStart.Name then
70         self._gameStarted = true;
71     end
72 end
73
74 --
75 -- ----------------------------------------------------------------------------
76 --
77
78 function PaddleMovement:OnDeactivate()
79     -- disconnect from busses we connected to.
80     self.InputNotificationBus:Disconnect();
81     self.GameplayNotificationBus:Disconnect();
82 end
83
84 --
85 -- ############################################################################
86 --
87
88 return PaddleMovement;
Fixing Problem #2 - Paddles Leaving the Arena
There are several ways we could handle this. A cheap and easy way might be just checking the x position of the paddle. If it's not within a hardcoded range we prevent it from moving further. This would work great, and be performant, the problem is we are going to want to leverage the physics system to handle the movement of the balls, which means we need the walls and paddles to be physics objects as well.
So to solve this problem, we're going to hook up physics now.
Physics in O3DE is handled across several components working together in tandem. Depending on the effect you are trying to achieve, you can use a different combination of components. Broadly speaking, though, I often find most of my objects fall into 1 of 5 categories.
1 - RigidBodies. These are objects which are fully simulated by the physics system.
Things like props that can be pushed around, grenades, or for games that are physics
based (space simulators for example) are all examples of places where I would use a
rigidbody. The ball in this Pong game is another example, and we'll look at setting it up
in the next article.
2 - Static Colliders. These are objects like level geometry that doesn't move, but still
interact with the physics simulation. Walls, barricades, and other non-moving objects
that physics objects can still bump into are Static colliders. The walls of our arena
are a good example of these types.
3 - Characters. These are special objects that don't behave like normal physics objects.
They can move through the simulation but have custom collision handling code.
Rather rather than bouncing and being controlled through impulses like rigidbodies,
characters will often be handled as a special case. For example they must
not be able to pass through walls, and have other considerations - like the ability to
climb steps, or walk up slopes - but they probably won't have a physics material
describing how much friction they have, or how bouncy they are.
Our paddles are good examples, as well as - well, most characters in games.
4 - Triggers. These are objects that have colliders but they do not change the
simulation. If a rigidbody or character runs into a trigger they do not bump
or bounce off. Instead, triggers are used to generate events when physics objects
enter, stay in, or leave specific areas. We can use these to start cutscenes,
create damage zones, play sound effects, and more. Triggers are giga useful.
We could use triggers to determine if a player scored a point, for example,
by creating a trigger collider near the goal point and detecting when the
ball entered it.
5 - Kinematic Rigidbodies. I don't use these very often, but they are objects that, like
characters, interact with the physics scene, but unlike characters, they are
unaffected by it. In a way, Characters could be considered a special form of
kinematic rigidbodies, just with custom collision handling that prevents them
from moving through colliders, but I usually reserve this designation for objects
that push and affect other things, but are not pushed by them. The canonical
example I use for these are things like moving platforms. We won't have any in
this project, (and I don't often use these).
Static Colliders on Walls
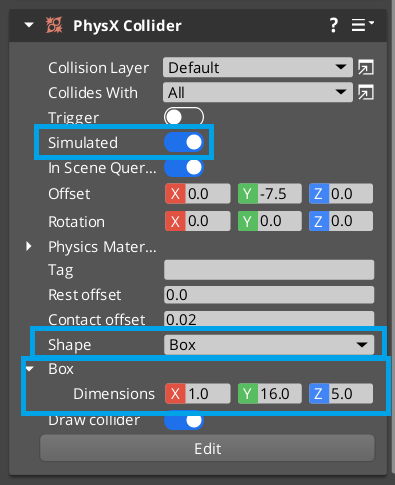
With that out of the way, lets first configure our walls so that they are Static Colliders
This is super easy. Add a PhysX Collider Component to each of our walls. Configure
the component so that the Simulated toggle is enabled. Additionally, make sure
that the collision shape is set to Box since our walls are boxes. We will also
need to describe to the physics engine exactly the dimensions of our object, so
use the Box | Dimensions field to edit the collision box to match our render
geometry.
The mesh we use for rendering is rarely the one we use for simulating physics. The more complicated the mesh, the more expensive it is to simulate. Spheres are the best, and boxes, or compound primitives like capsules, are good too. Generally we only simulate low fidelity proxies of our meshes in order to keep things running fast and smooth.
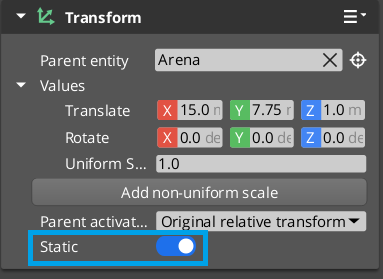
Then make sure that the Static toggle is enabled on your Transform component.
 |
 |
Do this to all 4 walls.
Character Control on the Paddles
Add a PhysX Character Controller to your paddle. There are a few settings that
are important to set, and there are many others that might be fun to play around with.
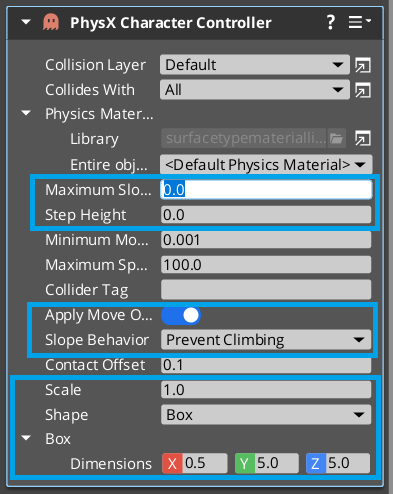
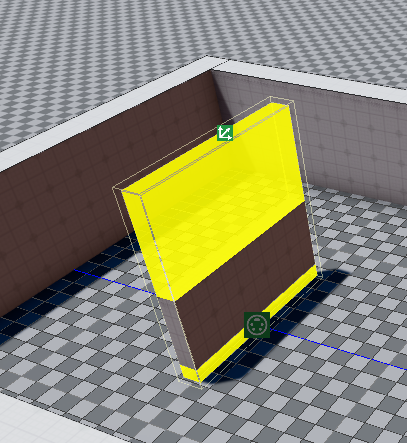
Maximum Slope: 0.0prevents our paddle from traveling up any ramps. Although our arena is perfectly flat, this can help prevent some kinds of glitching due to colliding with the walls and the ball.Step Height: 0.0same idea as slope. We don't have stairs, and I've definitely had physics simulations do things at high speeds like attempt to have our paddle climb ontop of our ball. This could help with that kind of thing, (and it doesn't matter since we don't want our paddle climbing stairs anyway)Apply Move OnTickdoes the fix we spoke about for problem #3 automatically for us. It collects all the movement changes for the frame, adds them together, then scales the motion based on the deltaTime. This way we get silky smooth and consistent paddle speeds.Slope Behavior: Prevent ClimbingSee a pattern here? We want to give as much info to the physics simulation that we don't want anything other than smooth motion along the x axis. (If there are motion constraints exposed somewhere, I'd definitely use those!)Scale, Shape, and Dimensionsshould all be set to match your paddle as closely as possible. One thing I did do, however, is extend the paddle in the z axis way beyond the visual mesh. This will help prevent problems like a high speed ball getting jammed under our paddle. Hopefully anyway, we'll find out in the next lesson when we get the ball physics working.
 |
 |
Now that we have the character controller setup, all we need to do is modify
the paddle movement to request motion through the CharacterController rather
than modifying the Transform directly.
CharacterControllerRequestBus.Event.AddVelocity should do the trick, and it's
a drop in replacement for TransformBus.Event.MoveEntity.
Here's the full source list anyway, just for copy and pasting.
 1
 2 --
 3 -- Properties #################################################################
 4 --
 5 local PaddleMovement = {
 6     Properties = {
 7         InputEventName = "Paddle01_Controls",
 8         PaddleSpeed = 1.0,
 9     }
10 }
11
12 GameStateEvents = require('scripts.gamestateevents');
13
14 --
15 -- Input Handler ##############################################################
16 --
17
18 -- there are 3 handlers we can receive for each input: OnPressed, OnHeld, and OnReleased
19 -- they each come with a value that may represent the state of the input (for example
20 -- the tilt of a thumbstick).  This is configured in the input binding.
21 function PaddleMovement:OnPressed(value)
22     self:_Move(value);
23 end
24
25 --
26 -- ----------------------------------------------------------------------------
27 --
28
29 function PaddleMovement:OnHeld(value)
30     self:_Move(value);
31 end
32
33 --
34 -- Internal Methods ###########################################################
35 --
36
37 function PaddleMovement:_Move(moveDir)
38     if self._gameStarted then
39         -- scale the current moveDir by both the paddle speed and the frame delta time
40         local deltaMove = Vector3(0, moveDir, 0) * self.Properties.PaddleSpeed;
41         CharacterControllerRequestBus.Event.AddVelocity(self.entityId, deltaMove);
42     end
43 end
44
45 --
46 -- Lifecycle ##################################################################
47 --
48
49 function PaddleMovement:OnActivate()
50
51     self._moveDir = 0;
52     self._gameStarted = false;
53
54     -- connect to InputEventNotificationBus and set ourselves as the handler
55     self.InputNotificationBus = InputEventNotificationBus.Connect(
56         self, InputEventNotificationId(self.Properties.InputEventName)
57     );
58
59     -- connect to the script event `GameStateEvents` to receive the game start event
60     self.GameplayNotificationBus = GameStateEvents.GameStart.Connect(self);
61
62 end
63
64 --
65 -- ----------------------------------------------------------------------------
66 --
67
68 function PaddleMovement:OnEventBegin(e)
69     if e == GameStateEvents.GameStart.Name then
70         self._gameStarted = true;
71     end
72 end
73
74 --
75 -- ----------------------------------------------------------------------------
76 --
77
78 function PaddleMovement:OnDeactivate()
79     -- disconnect from busses we connected to.
80     self.InputNotificationBus:Disconnect();
81     self.GameplayNotificationBus:Disconnect();
82 end
83
84 --
85 -- ############################################################################
86 --
87
88 return PaddleMovement;
Bonus: Fixing Problem #3 Using TickBus
Remember, rather than tying the speed of the paddles to the rate at which we receive input events, we should instead scale their movement based on how much time has elapsed. This way we will always get consistent speeds regardless of framerate hitches or spikes.
One way to do this, we need to get a reliable update message from the engine, as well as
information about how much time has elapsed since the last update so we can scale
our motion. In O3DE we do this by subscribing to the TickBus.
 1
 2 --
 3 -- Properties #################################################################
 4 --
 5 local PaddleMovement = {
 6     Properties = {
 7         InputEventName = "Paddle01_Controls",
 8         PaddleSpeed = 1.0,
 9     }
10 }
11
12 --
13 -- Input Handler ##############################################################
14 --
15
16 -- there are 3 handlers we can receive for each input: OnPressed, OnHeld, and OnReleased
17 -- they each come with a value that may represent the state of the input (for example
18 -- the tilt of a thumbstick).  This is configured in the input binding.
19 function PaddleMovement:OnPressed(value)
20     self._moveDir = value;
21 end
22
23 --
24 -- ----------------------------------------------------------------------------
25 --
26
27 function PaddleMovement:OnHeld(value)
28     self._moveDir = value;
29 end
30
31 --
32 -- ----------------------------------------------------------------------------
33 --
34
35 function PaddleMovement:OnReleased(value)
36     -- when a movement key is released, set the movement direction to 0
37     self._moveDir = 0;
38 end
39
40
41 --
42 -- Lifecycle ##################################################################
43 --
44
45 function PaddleMovement:OnActivate()
46     self._moveDir = 0;
47
48     -- connect to InputEventNotificationBus and set ourselves as the handler
49     self.InputNotificationBus = InputEventNotificationBus.Connect(
50         self, InputEventNotificationId(self.Properties.InputEventName)
51     );
52
53     -- connect to the tick bus so we can have a per frame update with frame times
54     self.TickNotificationBus = TickBus.Connect(self);
55
56 end
57
58 --
59 -- ----------------------------------------------------------------------------
60 --
61
62 -- This is the function that is called whenever we receive a tick event from
63 -- the TickBus.  It gives us both a deltaTime (how much time has elapsed since
64 -- the last update) as well as a currentTime (which we don't use in this example)
65 -- We could rename `currentTime` to `_` to be more idomatic.
66 function PaddleMovement:OnTick(deltaTime, currentTime)
67     -- scale the current moveDir by both the paddle speed and the frame delta time
68     local deltaMove = Vector3(0, self._moveDir, 0) * self.Properties.PaddleSpeed * deltaTime;
69     TransformBus.Event.MoveEntity(self.entityId, deltaMove);
70 end
71
72 --
73 -- ----------------------------------------------------------------------------
74 --
75
76 function PaddleMovement:OnDeactivate()
77     -- disconnect from busses we connected to.
78     self.InputNotificationBus:Disconnect();
79     self.TickNotificationBus:Diconnect();
80 end
81
82 --
83 -- ############################################################################
84 --
85
86 return PaddleMovement;
Now if we run, the paddle barely moves at all! That's because we changed the paddleSpeed
to 0.1 before. Paddle speed now has a specific scale: its in units per second.
A value of 0.1 means it moves 0.1 units every second. That's very slow. Try playing around
with the value until you like the speed at which it moves (for my level, I like 10.0)
Just note: this version does not collide with walls, and is unecessary if you are going through
a CharacterController. But, might be useful down the road~
Conclusion
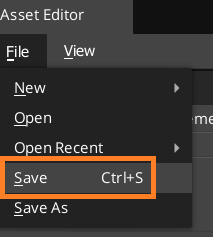
Make sure to save your work with Ctrl+S or File | Save
In this guide we covered a lot of new topics, including:
- Adding multiple
Event Generatorsto an input binding. - Using the
TransformBusto move Entities. - Use the
GameplayNotificationBuseven if the O3DE makers don't want us to. - Import library lua scripts from elsewhere in our project.
- Create static colliders
- Create character controlled entities
- As a bonus, how to subscribe to the
TickBusand get an update event with deltaTime.
In the next article we are going to learn how to script the movement of the ball.